Showing posts with label Black and white bokeh. Show all posts

Thursday, December 25, 2008

Christmas Eve This Year...

When I was a kid the big Christmas Eve event was sitting on my father's lap and having him read "The Night Before Christmas." As the story neared it's conclusion (the same conclusion every year) we'd breathe a little faster because following the story, we'd be allowed to open ONE Christmas gift -- as long as it wasn't the "big one."

That was then. This year, Sheree and I packed up her brand new Canon 50D (which she loves, by the way) and my eVolt and went to a cemetary.

It was freezing outside, with temps below the -26c mark. (You guys know about shooting in cold weather, right? You simply accept that the cold will suck the life out of your battery and make your camera cranky. It's best to keep the camera inside your jacket so it can stay warm.) We did a lot of shooting, ran back to the warm car and then headed out again.

It was a memorable afternoon. I love graveyards, especially when I stop to consider that under each tombstone is something that used to be a person, and that what is on the tombstone is what the people left behind think you should know about them.

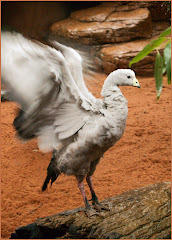
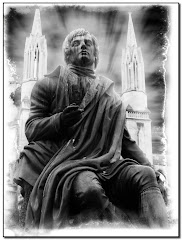
Sometimes it's just their last name (which I have always suspected is because that's the least expensive package) and sometimes there are grand displays. Like this angel.

I've seen her in summer under the blistering heat. Here she is in winter, with her fall foliage covered in the dusting of snow we got a few days ago.

I've added the bokeh to the edges to direct the eye to the subject of the shot. I increased the vibrance on the leaves inside Photoshop. Because she came off as "way too grey" -- I first used the Burn Tool to accent her lines. Then I used the nifty new CS4 Vibrance setting.

The shot from behind really worked for me as well. I loved the shell look of the wings, contrasted with the snow coating her head and her wings.

It's the same statue -- just two completely different views of it. See how changing your position can radically change the way your image is presented?

The shot at the top of this blog was something I set up. Those are my tracks heading off into the distance. I put them into the snow at that angle because I wanted them to head away from the tombstones, apparently going nowhere.

If you take a look at the largest tombstone, you will see why I did it this way...call it an end to Xmas if you like.

Cemetaries are wonderful places to shoot. Your subjects aren't going anywhere and they never ever complain about the cold.

Monday, December 22, 2008

Everything New is Old Again!

I suppose it was inevitable: as tech gets better and better that digital artists would want, one day, to make new stuff look like old stuff.
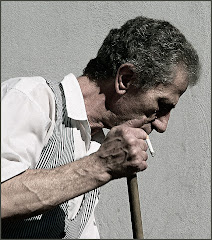
The photo to the left is a theater somewhere in rural Montana. It's a bright and vibrant building with colorful signage.

But, like so many things (including me) it seemed out of place, like it had been lifted out of another decade by some giant with a sense of humor and plunked down here.

This image was aged in under three minutes using some plug-ins and Photoshop tech. Here, in broad strokes, is how the image was created:

1) CONVERT IT TO BLACK AND WHITE. CS4 has a fabulous Adjustment Layer for this purpose. You want the B&W image to be sharp, so don't be afraid to us the Smart Sharpen tool from the Filters Menu.

2) Put the image into Sepia using any of a number of options. The fastest way to get a pleasing sepia tone is to go with Image> Adjustments> Photo Filter> Sepia. There's a live preview so you can get the precise amount of Speia you're after.

3) The edges were burned using a great little utility called (understandably enough) "Burnt Edges" from Alien Skin's Xenoflex 2 filter set.

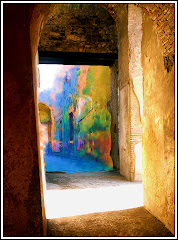
4) The final effect, that pleasing little acid wash, was done with OnOne's Photo Frame Pro. (Which is NOT compatible with CS4 without an upgrade, by the way.)

The great thing, the REALLY great thing, about Plug-ins, is that if you take the time to learn them, they can save you TONS of time and still give you the exact effect you were after.


This shot of the Sydney Opera House was taken from a balcony on a cruise ship. Sheree and I (and about three thousand other people) were docked beside it. Frankly, it was a little disappointing. It was dirty and tired looking and I stood there, snapping shots and wondering if I would get any kind of worthwhile image out of it.

This effect was completed in about three minutes as well.
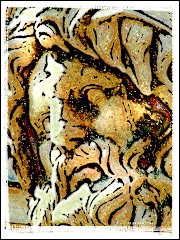
1) Convert to Black and White with CS4's B&W Adjustment Layer.

2) Use the Rectangular Marquee Tool to define a square and COPY that square onto it's own layer (PC: Control J).

3) Create a Stroke around this slightly smaller layer with the Layer Style options menu (That odd "fx" symbol at the bottom your Layers pallette) and choose a nice dark border (maybe 3 points). I like to add a Drop Shadow from the same menu as well...but that's just showing off.

4) Older Photographs had grain. I took a short cut and added the grain with Alien Skin's Exposure 2 package.

5) I manually added the Vignetting effect around the border of the image using the Burn Tool from the Toolbox.

It's always interesting to take a modern image: a race car, a space ship etc. and age the photo, so it looks like it was taken with a very old style camera. This creates a visual that makes an impact on the viewer because the visual style and the image portrayed don't match.

The effect can be very powerful. Try using in on a portrait. Add some bokeh. Use layers to create sepia and lens barrel effects. Blend the layers. Play around (oops I mean "investigate") the various blending options as you try one layer on top of another.

Have fun! If you come up with anything really cool, feel free to send it to me. I'd love to see it.

Tuesday, December 16, 2008

Bokeh in Black and White

When I was brand new to Photoshop, I discovered plug-ins -- also known as "filters." For those of you who are not yet privy to these marvellous things, they are software packages designed to work with Photoshop to create specific effects.

One of the first ones I discovered was by Flaming Pear. It had the unlikely name of "Melancholytron." It created a heavy blur around the bottom of the image and built in a sepia tone. I loved it. Lens blur adds such a wonderful atmosphere to an image, making it moodier. The blur also allows you to draw the viewer's eye to a specific aspect of the image. (I still use Melancholytron on occasion. It's available through Flaming Pear http://www.flamingpear.com/ for about twenty bucks.)

But since I started working with Alien Skin's Bokeh plug in (http://www.alienskin.com/ for $199.00) I haven't looked back. Read the full review a few blogs back.

I started thinking about combining the Bokeh effect with that other great conveyer of emotion and atmosphere: Black and White photography. I've been working with this idea for several days now (or at least as much spare time as a magician at Christmas can muster) and have been delighted with the results.

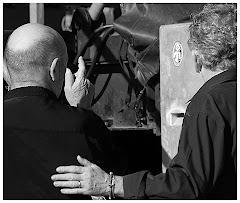
Have a look at the old couple at the top of this blog. I saw them one afternoon at Coney Island. It's called "A Little Off Center" because this couple seemed just a little out of step with the rest of the world. His arm is draped around his bride and the way they are sitting together watching the world go by makes me smile. But the image is about them...and the relationship they share. Everything else is a distraction.

Come to think of it, the initial image was full of distractions. (You can see the intial "finished picture" here: http://photoshopbasicsin6hours.blogspot.com/2008/11/taking-great-candid-people-shots.html -- like any image is ever finished.) Using Bokeh, I blurred them out and brought tight focus back onto the subjects. It made a better picture.

Cropping, and the whole processing of any final image, is a lot like writing a story. When you get into the fine tuning, you start cutting everything that doesn't fit smoothly with the tone or the story. There were a lot of people on the beach...and some litter as well. None of this added to my subject. So with the application of the Clone Stamp Tool and some specific blur, I was ready. The LAST step is the application of Bokeh -- so the effect is uniform.

Here's an image taken in July. It went from raw format to finished in less than five minutes. These two sisters were in a playground. Suddenly, for no apparent reason, the little sister raced across the playground and ran to her big sister for a hug. Then she went back to playing. I have no idea what pushed the "I need a hug" meter into the red zone. But I find the whole idea of an urgently needed hug very charming.

The post processing was very simple: using CS4's new-and-improved Black and White Adjustment Layer, I was able to create a punchy high contrast Black and White image. I sharpened it a little with Sharpen> Smart Sharpen to bring up the highlights in the younger girl's hair. Then I added a very light Bokeh and a drop shadow frame and the image was finished.

Bokeh isn't for every image. But when it fits, it's perfect.