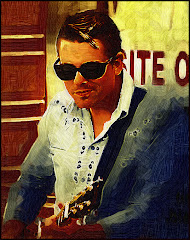
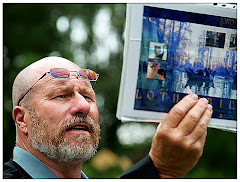
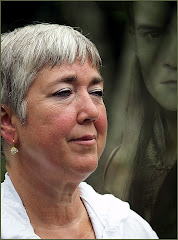
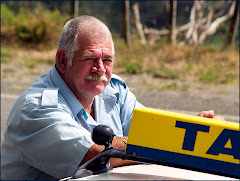
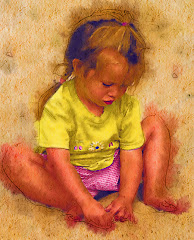
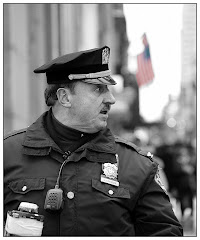
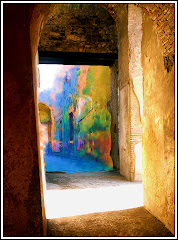
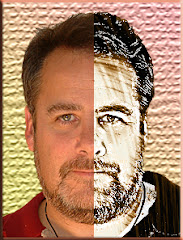
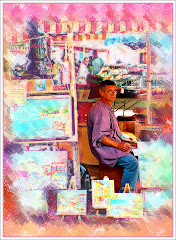
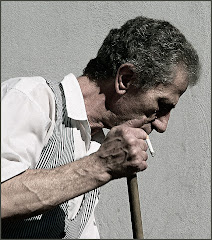
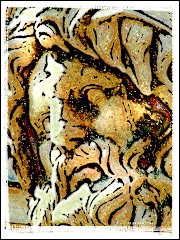
I haven't been around the blog much because I have been busy setting up a new community on Facebook. Web Jedi, Mark and I are pretty excited about it. We've invited our membership from Photoshop Basics and a lot of other people to join in and see what happens.
We've announced our first contest...and there's even a prize.
This isn't something we're making money from. It's a free community designed for all sorts of Photoshop users from advanced to beginners. We really want to create a community that allows people to share ideas and concepts, pictures and feedback.
We're nearly 30 members right now and the exciting thing is that they are from all over the world so we get a great cross section of people. Check it out at this link. Remember it's free. http://www.facebook.com/group.php?gid=2332124074
Feel free to pop by and have a look.
Showing posts with label Learn Photoshop Basics. Show all posts
Showing posts with label Learn Photoshop Basics. Show all posts
Tuesday, May 20, 2008


Thursday, May 15, 2008
Take another look at Black and White

There is a powerful thing that is created when a graphic goes from color to Black and White. You see details more clearly in a B&W than you do on a color graphic.
See that cute kid? I am blessed with children in my life who know how to pose. I asked her not to smile. She didn't and this is what happened.
Which picture is stronger?
I don't see a contest here. Despite the fact that the subject matter (the aforementioned cute  kid) is visually interesting, the job of the graphic artist is to make the visual "more gooder."
 kid) is visually interesting, the job of the graphic artist is to make the visual "more gooder."
One of the great things about Photoshop CS3 is the control we are given over the whole desaturation process. You will find this little gem under Image> Adjustments> Black and White. This will bring up a spiffy new menu that hasn't existed before.
To really understand the power of this menu, you need to do one of two things. First: open a picture that is LOADED with color. Play around with the sliders and watch the voodoo-magic-way-cool stuff that happens to your graphic as you do. The settings I used on the original are represented on Black and White graphic. But you will find that there are WAY too 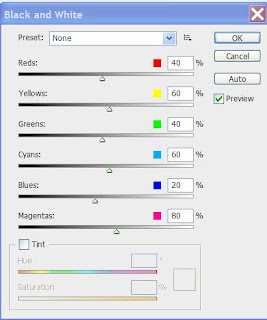 many options represented here for a wee blog.
 many options represented here for a wee blog.
The second option is, of course, to pick up our "Perfect Portraits" course from our website. It's due for release in the late summer/early fall.
Meanwhile -- take a hard look at the many many options you have at your fingertips with this wonderful little adjustment, which I happen to think is the second greatest thing about CS3. I'll tell you what the Absolute Coolest Thing is on a later blog.
Just three things you may want to keep in mind BEFORE using the B &W Adjustment menu:
1) Always ALWAYS work on a layer copy. This way if you mess it up the world, as you know it, won't end.
2) Do your other adjustments (sharpening etc.) before you start working in B&W.
3) You will often find that INCREASING THE CONTRAST before taking the whole thing to black and white can greatly enhance the finished product. Remember that the great luxury Photoshop offers is the ability to work in layers.
Finally -- you may want to consider simply desaturating PART of your graphic. I have one displayed on my NAPP site (the link's at http://www.photoshopbasics.com/ ) that is only an orange umbrella on an otherwise black and white graphic. Very easy to do -- and it can be remarkably effective.
Tuesday, May 13, 2008
Internet Woes...and Whoas!
 "They came from all over the continent and beyond. They came with dreams and greed and determination and nearly all of them failed. But for the few, the very chosen few, who had the exact right combination of luck, determination and fortitude, there were riches."
The quote is from a book called "Golden Dreams" by a relatively obscure author with the highly improbable name of Joseph Wrongway. (I suspect Joe has heard every possible joke about his name, so we'll let it go.) He was writing about the gold fields and the prospectors they drew. The perverse thing is that two miners could be literally side by side: one would hit a rich vein and the other would find nothing. (The pic to the right was taken in Alaska, which, frankly is as close as I have ever come to actual gold fields.)
This makes me think of the Internet. If our century has a gold field, this is it. And it's fitting, in some perverse way, that this field doesn't really exist anywhere. You can't GO to the Internet, although you can see it on your monitor. No one really knows exactly what it is because it isn't really just one thing. It's a conduit, I suppose.
It will carry my thoughts as I sit here in my office typing, to you. And it doesn't matter if you are next door or in India. We can still exchange ideas.
Your choice is what voice you choose to listen to...what communities you might want to belong to...what internet stores you choose to support with your hard earned dollars. It's all the Internet. Instant communication...instant information. Anywhere.
I am old enough that I am really impressed with stuff like that.
The Internet is also like the klondike gold fields because there are a few people who will crack the secret code and get rich. I understand the guys who own Google made two billion dollars in one hour when the stock jumped. Those kinds of earnings dwarf even what the richest gold strike of all time earned. And they did it in an hour.
All of the massive companies: Microsoft, Adobe, Yahoo, Dell and so many more make piles of money or send out cost effective precisely targetted email advertising through the Internet.
Amazing.
I started working on Photoshop Basics in 2004 as I remembered how much I struggled in the beginning to learn the simple basics of this great but seriously intimidating program.
I was frustrated. I had expended hundreds of dollars and hundreds of hours trying to figure out Photoshop. The whole thing made me nuts. There just didn't seem to be anywhere that just offered me a SIMPLE and STRAIGHTFORWARD package of information IN ONE PLACE that would show me the basics.
That's why I wrote the first course "Learn the Basics of Photoshop in SIX HOURS." My feeling was that there were some basic things that you HAD to know in order to start using the program properly. So I thought about it for a long time and then wrote them down.
That little course has done pretty well for itself...and that led to more and more courses.
Each one takes somewhere between five hundred to a thousand hours to write. It's not like a novel. You'd be surprised to learn how difficult it is to explain the steps even for something simple like create a new layer.
We've gotten some great feedback on our courses from more advanced users as well.
I don't have any illusions about getting rich doing this. I expect that people will enjoy the courses, maybe share their work. My ultimate plan is to create a community for Photoshop users, new and old, to share ideas and information. To paraphrase myself in the 70's, that whole notion strikes me as "way cool."
At the nexus of everything is involvement. Web Jedi (Mark) and I have put in countless hours trying to make it easy for you to get involved.
We have made sample lessons available for free.
We've just released a great "mini course" that goes into the nuts and bolts of stuff like creating Fantasy Art, totally off the wall text treatments and one of the most interesting portrait treatments you'll see.
It's a course called "Setting Your Brain Free" -- and it's available on our site (http://www.photoshopbasics.com/ ) for $9.95.
Is this an ad?
Sort of. But more than the ten bucks, we'd like to KNOW people are interested in what we're doing and are prepared to give it a try.
We really want to create a community where people can come and talk and share.
But I often have the feeling I am standing on my little six foot square claim on the Internet gold field trying to attract attention while there are six million other people trying to do the same thing.
Mark (website jedi) and I are starting to feel the strain. We don't much want to roll the potentially expensive dice with Google Adwords or the myriad of internet publicity options out there.
If you'd like to be a part of this, you need to let us know. We have email. We have products. We have a website and we'd love to hear from you.
Think about it.
Friday, April 18, 2008
Picturing Bits...Photographing Pieces
 This house was amazing. It sits just outside the French Quarter and is definately owned by an individual. There are flags and wood carvings, inventive and wildly contrasting colors. My wife and I stood for a good two minutes or so (which is a very long time considering my limited attention span) and gawked at the house.
How do you make a good image of this kind of place?
The first thing you DON'T do is take a broad shot of the house, trying to include everything inside one picture. Sure, your viewer will get the sense that this was a really cool house, but unless you do some vast Photoshop work, that's the only impression they'll get. Let's face it: the Photoshop work you would do would result in the visual representation of one or two elements of the picture anyway.
Think of one of those Find Waldo puzzles, where you have to look for a long time at confusingly similar images to find the geek in the red and white striped shirt. You study it and finally he jumps out at you.
But if you take a second to look at the WHOLE picture, where does your eye go? It travels around, looking for something to focus on. Your brain is trying to make sense of the image, wondering what the picture us about.
My very interesting house picture would have had the same effect. So I made an image of the doorknocker. And I broadened the focus to include this great textured door as well. It's a great effect, finished by adding a raised bevel frame using a combination of onOne's Photo Frame Pro and the Layer Style (that fx logo at the bottom of the layers menu) options to complete the effect.
The point here isn't so much the frame as it is the image inside the frame. It's an odd rectangle with an odd and beautifully textured image in the center.
Did you know that Hollywood heavyweight Nicholas Cage owns what is reputed to be the most "haunted house" in New Orleans? It's true. His house is featured on every Ghost Walk tour the city does. The tour guide tells you about a wealthy woman who lived there and tortured, starved and abused her slaves in secret. Now you can hear the ghostly clanking of chains, see strange misty people and a bunch of other stuff that sounds a lot scarier in the dark.
 Tourists lined up to get pictures of this house -- which is by anyone's account, a pretty ordinary looking house. Not an interesting image. It would be different, of course, if it were to have dramatic gables and a hunchbacked butler answering the door. But it doesn't. So I took two images from this house...each one is designed to allow me to tell the viewer the story about the hauntings. As with the Creepy Doorknocker above I focused on one or two elements.
This is an urn just inside the doorway to Nick's house. (Just try to tell me he's not playing up the whole "my house is haunted" thing...) and it was the most "obviously haunted looking thing" in the area.
Do you think this picture just might be more dramatic than a shot of a fairly ordinary New Orleans house?
The second pic I took here, by the way was of bright yellow flowers on the second floor balcony. The reasons for this, and the treatment of the picture is discussed in the upcoming "Perfect Portraits" course coming out in the fall.
If you've been following this blog, you know that my wife and I both like graveyards. The older the better. We hit the jackpot in New Orleans and Brownsville, Texas. There were some amazing pictures here.
Many postcards feature panoramic views of raised crypts. These are great -- but they don't say any one particular thing about the grave, the person in the grave, how people who have seen the grave responded -- they are just pics of generic graveyards.

This picture was taken in a little out of the way graveyard along a back Texas highway. From here you can spit into Mexico. The grave marker surprised me. It was visually interesting. It was elegant -- even though it depicted the most horrific death possible. Someone had gone to the trouble to hack the head off. It makes for an interesting picture.
First, I reduced the picture to a high contrast black and white, using both Desaturation and Alien Skin's Exposure filter set. I had pre-selected the flowers and dropped the contrast just a little bit so that it would retain color -- but not too much.
Think for a second about how this one cross would fail to stand out in a panorama shot, and how much more effective it is when shot by itself.
The upshot of this whole blog is that shooting bits of the "whole" picture can result in some very strong graphics indeed.
I am always interested in seeing "Bits" photos, by the way. If you've got something you'd like to share send it to us. We'd love to post it and allow others to comment on it.
Monday, March 3, 2008
Resolving Resolution...
When I was learning Photoshop, totally understanding the whole resolution thing made my head hurt. I simply could NOT get a straight answer. I got lots of people telling me things and even as they were talking I could feel my eyes glass over.
I really wanted someone to explain what resolution was in plain and simple terms. And I wanted to know what kind of resolution I should have for the various projects I was working on.
Here is the Patented David Thiel Explaination of Resolution And How It Effects YOUR PICTURE.
Ready?
Resolution is how much information is in your picture. MORE information means your picture file is BIG and if you are planning to make a big print out of that sucker, you WANT a BIG file. Why? Because more information means more pixels (the tiny dots that make up a picture) and you WANT lots of pixels to give you a nice crisp print.
LESS information makes your picture file SMALLER. You want smaller files for pictures that you plan to display on the web or use in PowerPoints. The smaller files make it easier for the computer to handle and eat up much less space on your drive. EVERY picture on this blog is a small file which is why they load very quickly. ..but would make terrible prints.
Photoshop and Photoshop Elements make it very easy to change the resolution of your photo.
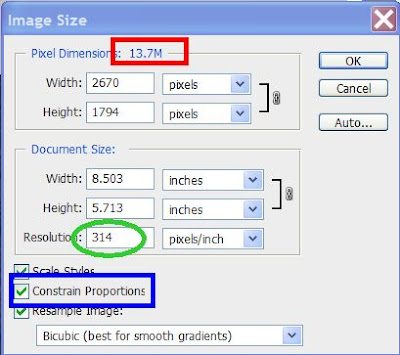
Go to Image> Image Size and you get this option screen. In the red box is the Pixel Dimension information. Here you see it's nearly 14 Megabytes. This size of file would give PowerPoint a serious headache.
This is the photo in it's "just downloaded" state.
The other two Very Important Boxes are also highlighted. RESOLUTION (inside the green circle) is where you can cut the overall file size.
The value of Resolution will directly impact that 13.7M file size. If you click inside Resolution and change it from 314 to 72, you'll note an immediate change in the file size.
Constrain Proportions is ALSO checked. This is defined in the blue box. If you plan to work with the width or height of the photo size and you don't want Aunt Martha to turn out looking like an alien invader from the planet Ziggat, you want to ensure this box is checked.
So RESOLUTION affects the amount of information in a graphic.
How do you decide what is the RIGHT Resolution?
You decide in advance WHERE you plan to display your work. Lots of artists, myself included, design work for display online...and in PowerPoints. I rarely print. I will nearly always cut the resolution to 72. (If you're printing, you want the leave the file size as large as possible. There are tables for how big these files should be if you're printing a smaller size photo as opposed to a larger one...but save yourself the headache. Just leave the file size BIG.)
The upside of cutting the resolution means I can work very quickly inside Photoshop (the application of filters, for example, is much faster since the software has a much smaller amount of informaiton to work with) and I know the final product will be easily uploaded to blogs, websites and PowerPoints.
The downside: I can't expect prints of any decent quality and if I am EVER planning to print my photo, I will have to do it all over again.
Here's the very best way to have your cake and eat it too: IF you are willing to live with slower Photoshop response time, do all your edits and all your work with the large sized file. THEN reduce the resolution to 72 and "Save As" a reduced file. This way you have ALL your options open.
As always, make sure that you save an UNFLATTENED graphic in the Photoshop format so you can go back and make changes if you like. You'll eat up vast amounts of disc space doing it this way -- but you'll be glad you did when you desperately need to print the photo.
Besides, external drives are MUCH cheaper now and you can always save the photo there.
I really wanted someone to explain what resolution was in plain and simple terms. And I wanted to know what kind of resolution I should have for the various projects I was working on.
Here is the Patented David Thiel Explaination of Resolution And How It Effects YOUR PICTURE.
Ready?
Resolution is how much information is in your picture. MORE information means your picture file is BIG and if you are planning to make a big print out of that sucker, you WANT a BIG file. Why? Because more information means more pixels (the tiny dots that make up a picture) and you WANT lots of pixels to give you a nice crisp print.
LESS information makes your picture file SMALLER. You want smaller files for pictures that you plan to display on the web or use in PowerPoints. The smaller files make it easier for the computer to handle and eat up much less space on your drive. EVERY picture on this blog is a small file which is why they load very quickly. ..but would make terrible prints.
Photoshop and Photoshop Elements make it very easy to change the resolution of your photo.

Go to Image> Image Size and you get this option screen. In the red box is the Pixel Dimension information. Here you see it's nearly 14 Megabytes. This size of file would give PowerPoint a serious headache.
This is the photo in it's "just downloaded" state.
The other two Very Important Boxes are also highlighted. RESOLUTION (inside the green circle) is where you can cut the overall file size.
The value of Resolution will directly impact that 13.7M file size. If you click inside Resolution and change it from 314 to 72, you'll note an immediate change in the file size.
Constrain Proportions is ALSO checked. This is defined in the blue box. If you plan to work with the width or height of the photo size and you don't want Aunt Martha to turn out looking like an alien invader from the planet Ziggat, you want to ensure this box is checked.
So RESOLUTION affects the amount of information in a graphic.
How do you decide what is the RIGHT Resolution?
You decide in advance WHERE you plan to display your work. Lots of artists, myself included, design work for display online...and in PowerPoints. I rarely print. I will nearly always cut the resolution to 72. (If you're printing, you want the leave the file size as large as possible. There are tables for how big these files should be if you're printing a smaller size photo as opposed to a larger one...but save yourself the headache. Just leave the file size BIG.)
The upside of cutting the resolution means I can work very quickly inside Photoshop (the application of filters, for example, is much faster since the software has a much smaller amount of informaiton to work with) and I know the final product will be easily uploaded to blogs, websites and PowerPoints.
The downside: I can't expect prints of any decent quality and if I am EVER planning to print my photo, I will have to do it all over again.
Here's the very best way to have your cake and eat it too: IF you are willing to live with slower Photoshop response time, do all your edits and all your work with the large sized file. THEN reduce the resolution to 72 and "Save As" a reduced file. This way you have ALL your options open.
As always, make sure that you save an UNFLATTENED graphic in the Photoshop format so you can go back and make changes if you like. You'll eat up vast amounts of disc space doing it this way -- but you'll be glad you did when you desperately need to print the photo.
Besides, external drives are MUCH cheaper now and you can always save the photo there.
Monday, October 29, 2007
Gee...ANOTHER Photoshop Blog
Whatever would possess a man to start a NEW BLOG in this day of millions and millions of blogs?
Two things.
FIRST: I remember how tough it was to get a handle on Photoshop in the beginning. My choices for "learning how to do stuff" came from three sources. I could battle my way though dry dry manuals written by joyless people. I could pick up a few instructional gems on-line for free (and find myself added to dozens of SPAM lists). OR I could spend time with well meaning but misinformed instructors who offered their "expertise" for free.
Learning Photshop is tough.
SECOND: I am hoping that you like what you see here enough that you will come to my website at http://www.photoshopbasics.com/ and learn a little more about this great software.
When I was starting with Photoshop, I was surrounded by people who knew WAY more than I did about it. Much of what I learned was absorbed and gleaned from listening.
Wouldn't it be GREAT to create a community for people who are brand new to Photoshop? People could trade ideas...concepts...they can learn new techniques...they could post their art.
Photoshop gives your imagination wings. Honest. If you can visualize it...you can create it.
You won't have to deal with condescending "experts" here or there. I promise.
So that's what my main site is about. We've set up a Facebook community as well as creating publishing some downloadable courses. Click on the link above to find out more. (You KNOW you want to...)
THIS site is designed to record some of the growth pains of trying to set up a Photoshop basics site...you'll find all the actual instruction in Photoshop at http://www.photoshopbasics.com/.
This site exists to draw you to that one...and to allow one voice to float around cyberspace and chronicle the growth pains.
Photoshop Basics actually began around the year 2000. I had this idea that I COULD have learned all the stuff I NEEDED to know in about six hours.
1) You need to know where the Important Stuff is.
2) You need to know what the Important Stuff does.
3) You need to know how to SELECT Stuff.
4) You need to know how to CHANGE Stuff (y'know...Filters, plug-ins and the like)
5) You need to understand LAYERS...because that's what gives Photoshop it's creative wheels.
That's it. Beyond all this -- it's all blah blah stuff.
So the first inception of the site was developed with the aid of a webmaster from Halifax who didn't listen to anything I said. People had to order the courses and wait for the discs to arrive. (Memory size on these courses was MASSIVE because I wanted the Basics Course to have full screen "live" tutorials.)
I sold some.
THEN, about six months ago, I chose to take on a partner who knows much more about things of the Web than I do. Our shiny new site us up and running as of last week. The Facebook community is up -- and hopefully we'll see YOU there.
People can download courses now. That means I don't have to be burning discs all the time and hotfooting it over to the post office with orders. We've even revised the payment system so people can work with PayPal instead of the payment people we HAD been working with.
Will you, good reader, take a second to go to our new site? We'd really appreciate knowing what you think. You'll find regular postings of reviews and basic techniques there.
I'll continue here because it feels kind of good. Even if there is a very good possibility that I am talking to myself.
Ahem.
Two things.
FIRST: I remember how tough it was to get a handle on Photoshop in the beginning. My choices for "learning how to do stuff" came from three sources. I could battle my way though dry dry manuals written by joyless people. I could pick up a few instructional gems on-line for free (and find myself added to dozens of SPAM lists). OR I could spend time with well meaning but misinformed instructors who offered their "expertise" for free.
Learning Photshop is tough.
SECOND: I am hoping that you like what you see here enough that you will come to my website at http://www.photoshopbasics.com/ and learn a little more about this great software.
When I was starting with Photoshop, I was surrounded by people who knew WAY more than I did about it. Much of what I learned was absorbed and gleaned from listening.
Wouldn't it be GREAT to create a community for people who are brand new to Photoshop? People could trade ideas...concepts...they can learn new techniques...they could post their art.
Photoshop gives your imagination wings. Honest. If you can visualize it...you can create it.
You won't have to deal with condescending "experts" here or there. I promise.
So that's what my main site is about. We've set up a Facebook community as well as creating publishing some downloadable courses. Click on the link above to find out more. (You KNOW you want to...)
THIS site is designed to record some of the growth pains of trying to set up a Photoshop basics site...you'll find all the actual instruction in Photoshop at http://www.photoshopbasics.com/.
This site exists to draw you to that one...and to allow one voice to float around cyberspace and chronicle the growth pains.
Photoshop Basics actually began around the year 2000. I had this idea that I COULD have learned all the stuff I NEEDED to know in about six hours.
1) You need to know where the Important Stuff is.
2) You need to know what the Important Stuff does.
3) You need to know how to SELECT Stuff.
4) You need to know how to CHANGE Stuff (y'know...Filters, plug-ins and the like)
5) You need to understand LAYERS...because that's what gives Photoshop it's creative wheels.
That's it. Beyond all this -- it's all blah blah stuff.
So the first inception of the site was developed with the aid of a webmaster from Halifax who didn't listen to anything I said. People had to order the courses and wait for the discs to arrive. (Memory size on these courses was MASSIVE because I wanted the Basics Course to have full screen "live" tutorials.)
I sold some.
THEN, about six months ago, I chose to take on a partner who knows much more about things of the Web than I do. Our shiny new site us up and running as of last week. The Facebook community is up -- and hopefully we'll see YOU there.
People can download courses now. That means I don't have to be burning discs all the time and hotfooting it over to the post office with orders. We've even revised the payment system so people can work with PayPal instead of the payment people we HAD been working with.
Will you, good reader, take a second to go to our new site? We'd really appreciate knowing what you think. You'll find regular postings of reviews and basic techniques there.
I'll continue here because it feels kind of good. Even if there is a very good possibility that I am talking to myself.
Ahem.
Subscribe to:
Posts (Atom)

 Posts
Posts