Wednesday, December 17, 2008

Photographing Kids: The Picture AFTER the Picture

I am blessed in many ways. I am married to a splendid woman and we travel the world together. I have a world-class cat. I love what I do for a living and...I am blessed with little people in my life who are happy to pose.

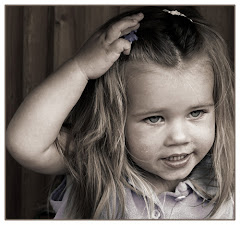
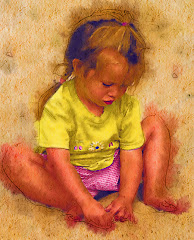
This young lady is one of those people. Here are three pictures from dozens taken during a fifteen minute session on our back porch one summer afternoon.

She has known me since birth. We are comfortable together. But she was still only five years old. In working with "little people" there are a lot of things to keep in mind.

First: you need to keep talking. Photographers have a lot to think about: settings, the subject, the light, the composition. We have a tendancy to want to concentrate on taking the shot and ignoring the subject.

This doesn't work with kids.

You need to keep communicating. You need to keep the child engaged in the process. You need to make them laugh, to look in the directions you want them to look. You need to keep your model engaged in the whole process. There has to be a powerful link to the process between the photographer and the subject.

You need to keep shooting. We (as in the royal "photographer we") have a habit of checking the LCD screen and the histograms to see what we got.

Don't do this when you are working with kids. The idea is to have nothing coming between you and the child. The camera has the potential to become one of those things: it's a big mysterious box to little eyes. Ideally, the camera becomes part of the whole adventure and doesn't represent something scary or misunderstood to the child. In order to keep shooting there are a couple of things that make the process smoother:

1) Do all your settings and camera fiddling before you start with the child. That's important because you need to concentrate on just shooting once the session starts.

2) Use a Burst or Sports Mode. Kids move very quickly and emotions flicker across their faces like vapor. You need to shoot very quickly so you can catch every nuance of what they do.

3) Keep the atmosphere positive. There should be lots of laughter and lots of positive words spoken. The child needs to feel confident and have the ability to relax in front of the camera.

Take the picture AFTER the picture. This is one of the most valuable things I have learned from watching my wife work with people. She's done a ton of portraits. One day I realized how she got such great candid looking shots.

She would take the shot they expected her to take. Just as they were leaving, she'd engage them in conversation and then she would say something funny. When they responded, she would take the shot and she'd consider that the portrait.

It's a technique I have used (okay copied) many times. It works like a charm.

You will get "real person."

And the "real person" is much more interesting than those unnatural posed shots, which are particularly awful when children are in them.

Tuesday, December 16, 2008

Bokeh in Black and White

When I was brand new to Photoshop, I discovered plug-ins -- also known as "filters." For those of you who are not yet privy to these marvellous things, they are software packages designed to work with Photoshop to create specific effects.

One of the first ones I discovered was by Flaming Pear. It had the unlikely name of "Melancholytron." It created a heavy blur around the bottom of the image and built in a sepia tone. I loved it. Lens blur adds such a wonderful atmosphere to an image, making it moodier. The blur also allows you to draw the viewer's eye to a specific aspect of the image. (I still use Melancholytron on occasion. It's available through Flaming Pear http://www.flamingpear.com/ for about twenty bucks.)

But since I started working with Alien Skin's Bokeh plug in (http://www.alienskin.com/ for $199.00) I haven't looked back. Read the full review a few blogs back.

I started thinking about combining the Bokeh effect with that other great conveyer of emotion and atmosphere: Black and White photography. I've been working with this idea for several days now (or at least as much spare time as a magician at Christmas can muster) and have been delighted with the results.

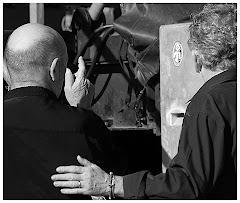
Have a look at the old couple at the top of this blog. I saw them one afternoon at Coney Island. It's called "A Little Off Center" because this couple seemed just a little out of step with the rest of the world. His arm is draped around his bride and the way they are sitting together watching the world go by makes me smile. But the image is about them...and the relationship they share. Everything else is a distraction.

Come to think of it, the initial image was full of distractions. (You can see the intial "finished picture" here: http://photoshopbasicsin6hours.blogspot.com/2008/11/taking-great-candid-people-shots.html -- like any image is ever finished.) Using Bokeh, I blurred them out and brought tight focus back onto the subjects. It made a better picture.

Cropping, and the whole processing of any final image, is a lot like writing a story. When you get into the fine tuning, you start cutting everything that doesn't fit smoothly with the tone or the story. There were a lot of people on the beach...and some litter as well. None of this added to my subject. So with the application of the Clone Stamp Tool and some specific blur, I was ready. The LAST step is the application of Bokeh -- so the effect is uniform.

Here's an image taken in July. It went from raw format to finished in less than five minutes. These two sisters were in a playground. Suddenly, for no apparent reason, the little sister raced across the playground and ran to her big sister for a hug. Then she went back to playing. I have no idea what pushed the "I need a hug" meter into the red zone. But I find the whole idea of an urgently needed hug very charming.

The post processing was very simple: using CS4's new-and-improved Black and White Adjustment Layer, I was able to create a punchy high contrast Black and White image. I sharpened it a little with Sharpen> Smart Sharpen to bring up the highlights in the younger girl's hair. Then I added a very light Bokeh and a drop shadow frame and the image was finished.

Bokeh isn't for every image. But when it fits, it's perfect.

Thursday, December 11, 2008

When Photographers go Cruising...

I like cruising. You don't have to unpack three times a week, the food you eat will not kill you and there are lots of people nearby to bring you cool drinks and herd you toward the next buffet.

I hate cruising because you just don't get very long in each port (usually about a day), sometimes your formal dinner table companions are just slightly more animated than drying spackle and all of the "extra fee" options you can pick up during those "at sea" days can really make for a nasty surprise when the bill comes due.

But on the balance -- I love cruising. Since Sheree and I will be celebrating New Year's eve by sitting on a runway to start a trip that will ultimately take us down the Amazon, cruising is on my mind. Having braved a number of cruises over the years, I have come to the conclusion that there are FIVE RULES for GETTING GREAT SHOTS ON CRUISES. Here they are:

1) Take a Power Bar. The people who design cruise ship staterooms think one plug-in for two photographers is plenty. It's not. Take a power bar with at least four additional plug-ins so you can power those batteries and laptops. This keeps you from having to make the decision of whether or not to throw your companion overboard so you can definately hit the next port with two charged batteries.

2) Do Your Research. The great thing about taking a cruise is that you know where you're going in advance. The internet is a WEALTH of great information on the places you are going. You will need to be well organized and decide IN ADVANCE where you want to shoot.


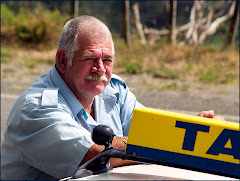
Local people can be a great resource. Don't be afraid to take a cab. The fellow in the image above is a cab driver in NZ who gave us a truly wonderful day. His name's Lance and he took us to vineyards and some of the most amazingly beautiful places only locals know about. Cabs are more expensive...but they can be truly wonderful.

3) Dilly Dally at Your Peril. You'll want to be the FIRST off the ship or the first in line for the tender boat. (Sometimes cruise ships need to ferry the passengers off the ship and to shore in tender boats. This results in LONG lines and a ton of wasted photography time.) Get there first, using elbows if necessary, to get off the ship before the aggressive people do. Those extra ten minutes of sleep can cost you BIG when the line up forms.

4) Don't Be Afraid of Excursions. These are extra cost "tours" available when you are in a port. (The image above is from one of the Great Excursions of All Time: a Lord of the Rings tour we took in New Zealand. It's written about elsewhere in this blog...seek and you may find it, Frodo.) If you buy them from the cruise ship company you can count on two things: they are going to be more expensive, and they will take good care of you. The cruise ship will wait for you if a cruise-line tour runs late. But you'll see a pile of tour operators waiting for you at each port. Some operators are wonderful...some aren't. But if they don't get you back to the ship on time, you will need to borrow a snorkel set from the guide because the ship will be gone.

5) Be Nice. Be nice to your cabin steward, the locals in the ports, the tour guides you use. Be nice to the shop-keepers and the kids selling chicklets to the tourists. Talk to them before you take their picture...and don't be cheap. Give them a couple of bucks for posing. You may even try your hand at speaking their language. Whenever I do, it provides everyone with hours of amusement.

5a) Don't Be Stupid. You are in a foreign land. In many cases you won't speak the language. It probably isn't a good idea to follow that scurvy looking guy down a dark alleyway for a shot. If your gut is telling you "no" don't go. Stay where the people are. You need to be alert and stay alert. This means it's also not a good idea to get loaded when you are in a port. Your pictures will come out blurry and crooked...and you will probably get rolled and/or lost on your way back to the ship.

5b) Don't be a Pansy. You travel to meet people and have an adventure. The idea here is simply not to get stabbed, shot, mugged or sold to white slavers. None of these makes for golden cruise ship memories. Also: don't hang around the tourist traps in ports. Diamonds International etc has all the same crap you get at home. Be reasonable. Have fun. Be smart.

5c) Check on Local Regulations. For the Amazon, Sheree and I needed Yellow Fever shots, a visa from Brazil (which took nearly three weeks) and Malarone, an anti-malaria drug. Usually the cruise ship company will let you in on this stuff, but not always. (We couldn't get into the famous Monte Carlo casino because we didn't know we needed to take our passports with us...) Check into local customs too. For example: there are some places in the mideast where women need to dress a certain way to avoid offending the locals and drawing unwanted attention.
There are a ton of sites filled with helpful advice on local sites, customs and highlights. Just go to Google and input the name of where you're going, and type words like "Customs" and "Tourism" or "Activities." You'll get more information than you could possibly use within seconds.
If you are interested in cruise info try http://www.cruisecritic.com/ for specifics on the ports and the boats. These are serious cruisers and they can provide tons of useful tips.

Follow these rules, grasshopper, and you will be happy cruisers.

How many sleeps till I go?

Eighteen. But who's counting?

Monday, December 8, 2008

Visual Creativity. Honest.

I don't know of a single writer who hasn't glared at that blinking cursor. It just sits there like an insensitive insect waiting for you to come up with the words while it does nothing except sit there blinking stupidly. It's a tyrant, really.

Visual artists have the same issues. We sit there with our hands in our laps looking at the computer screen. Sometimes we have a germ of an idea that can be developed. Sometimes (okay rarely) we know exactly what to do. But most of the time there's this tickle of a concept at the back of our brains that runs away like an arm-flapping idiot each time we try to trap it.
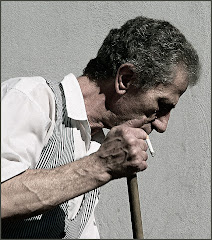
Peter J, from New York, wrote in to ask if I had any ideas on how to be creative. Later this morning I was on the NAPP board and the same topic came up again.

"How do you learn how to be creative?" asks the Photoshop newbie. "There must be a course somewhere."

Nope. There are courses about creative techniques. Oodles of them. And there are books about getting in touch with your imagination. I mean you could dance naked in the woods and pound on drums for a few days -- but I seriously doubt that you will find yourself with a perfectly formed notion for how to break that creative block. All you may wind up with is a nasty rash.

There are even courses on how you can take an idea and develop it into a striking visual. (Check out "Photoshop for the Creative Soul" at http://www.photoshopbasics.com for our course on this. Hint. Hint.)

But if someone tells you they can teach you how to BE creative, they're lying.

You can be taught how to copy someone else's method. There are tons of Photoshop books that teach this stuff. You can look at an artist like Ben Willmore (http://www.whereisben.com/) and see what he's been up to. I really respect the guy -- and the quality of his work is unreal.

But, personally, I don't want to be Ben Willmore. Why would I want to copy his work? I'm happy to sit and listen as he teaches me stuff -- but only so I can apply said "stuff" to my work.

Why's that?

Because true creativity isn't the result of inspired copying of someone else. You can learn stunning technique this way...but you only learn how to be creative by pouring all that knowledge through the filter of YOU.

True creativity is the direct application of 24 carat, 100% YOU to an idea. Think of it as a one of a kind Photoshop filter: There's only one you. That means there's only one person who can apply imagination and execution to an image that is the direct outgrowth of who you are.

The only way I can suggest for getting creative isn't to take a course. It's to roll up your sleeves, stick your hands into the muck and start pushing stuff around. It's going to be messy. And you are going to have disasters. You will have moments when you want to throw the computer through the window and then follow it (given that you're far enough away from the ground) because NOTHING is turning out right.
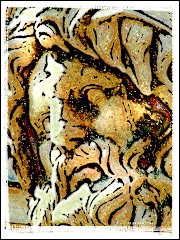
I 100% guarantee there will be dismal awful images if you do it this way. You'll delete them, you'll flush with embarassment whenever you think of them. You'll pray that no one you ever showed them to kept a copy...and you'll start putting a little money aside each week in case they DID keep a copy and want to blackmail you with it later.

Being creative and turning that "creative switch" on inside your brain and spirit would be pretty easy if you knew where it was. I often can't find mine...particularly when deadlines are looming. So I have to thrust my hand into a lot of dark holes and smelly caverns as I look for it.

And the real pain in the butt? That damn "creative switch" often disappears minutes later and you have to start looking for it all over again. That's when you think to yourself "Gee...I thought I had a great idea. Where was I going with this again?" Now you have a name for it: Switch Slip.

See the image above? I spent four hours on this one day many moons ago. I'd just discovered Photoshop and had a hankering to do..."something." I entered it in a contest and it placed in the bottom third. How come? It's not creative. It's a mess, really. What it lacks in creativity it makes up for in pseudo-artsyness. It has vague ideas about money and fighting on top of it and women.

Yup. It's one of those "I can't believe I posted it ANYWHERE" images. It's pretentious crap. There. I admit it...now I can stop paying off that guy in Germany who keeps getting those installments in small unmarked bills.

What's the upside of this whole creativity thing?

Once in a while...sometimes for a really long time...you feel your spirit soar and your heart beat faster. You feel the blending of mind, spirit and body pouring itself into the project. Your hands blur over the keys or the controls and the sensation is better than a triple fudge sundae.

And less fattening.

Friday, December 5, 2008

Bokeh is Here

"I am absolutely not buying any more filters or plug ins," I told myself as I looked in relative wonder at Alien Skin's latest contribution to the Photoshop universe.

It's called "Bokeh" and is a very easy to use simulation of the effect photographers spend a ton of money on specialized lenses and years of careful study to achieve.

Simply put, it's the selective blurring of portions of the image. This allows the artist to gently draw your attention to the precise area of the image he wants you to see.

Photographers are all a-flutter about bokeh technique because it also has the potential to add atmosphere and mood , create professional looking images and make you look way more skilled than you actually are. (I'm all for that.) It also hints that you have cash to burn, since actually shooting bokeh requires some pretty expensive lenses.

"Can't hurt to download the demo," I told myself with an innocent shrug. "It's only a demo. I'll use it for the thirty days and then I'll delete it. If tempted, I shall simply apply my iron will and remind myself this is simply a learning opportunity." I would have patted me on the back at this point if I could have reached back that far. I settled for squaring my jaw and looking sternly into the computer screen.

"Who's gonna spend two hundred bucks on a lens blur?" I said to myself. Again. I think I may have sputtered just a little in indignation at the very thought. But when I started using this plug-in my reserve started to waver and my iron will developed immediate rust. Bokeh by Alien Skin simulates the effect you'd get using some very specialized glass and it does it so easily that it's hard not to fall in love with it.

I still wasn't going to buy it, you understand. After all, I just upgraded to Photoshop CS4 and bought HDR software. In these times of economic uncertainty, you'd have to be crazy to drop another pile of cash on software, right?


With Bokeh, you can create a "Focus Region" using an oval selector or a planar. Make it big or little. Define the precise amount of blur you want. Set the precise areas of focus. (This is very precise stuff.)

The basic process takes about thirty seconds.

My mind started turning to some of the uses for Bokeh -- on the very off chance I would even consider buying it...not that this was an option I was actually considering, you understand.

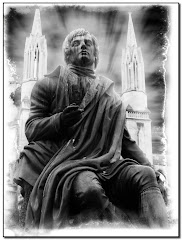
Portraits could be softened in an instant. Streetscapes could be created that would allow me to highlight the exact elements I want the viewer to see. Clutter is blurred away. Bokeh would add a whole new dimension to statue and building photography. I could even do campy things like make hearts in the blur area. (Okay. Probably not that.)

At this point I really started to investigate the options. Hugely expensive lenses are simulated flawlessly (I am "using" a Canon EF 50mm f/1.2LII @ f/2 here, which creates a 20% blur).


Use your imagination and pretend that you can source all the lenses in a camera store, pretend you understand precisely how to use them and that you've spent nine years on a mountaintop somewhere with a guru learning the disciplines and techniques of Bokeh. Okay?

Now pretend that you have the ability to take precisely the same shot with each of these lenses and that you know exactly what you're doing to create the bokeh effect you want. Yup. That's a lot of pretending, right?

Like let's pretend that I decided to take the exact same image again but this time I really wanted to highlight my subject...and created a 50% blur with some slight vignetting on the fringes which is the image just above.

Alien Skin's Bokeh starts falling into the "way cool" category pretty quickly.

Two hundred bucks suddenly didn't seem all that expensive. When you've stacked a little pile of money against the many thousands of dollars it would cost to outfit myself with all the necessary cameras, glass, classes and books I'd need to get these shots, two hundred bucks didn't seem too bad at all.

A bargain!

Why I would be insane to pass something like this up! Moreso, it was clearly my duty as a graphic artist to add this software package to my arsenal of visual options. In fact I owe it to the whole freaking world to pick it up!

I emailed Alien Skin, asked if they gave a discount to NAPP members and they took 10% off. Okay. So it's still $179. But I have to say that I am seriously thrilled with the package. Thrilled. I have been working with it for hours and I just keep getting "thrilled-er."

As with all Alien Skin software, the initial use is very simple (which is good because I am a very simple guy) but there are a ton of options and settings that will allow the artist to get the precise effect he is looking for. I haven't even really scratched the surface of what this software will do. But I wanted to tell you about it right away because it's something I really suggest you take a look at.

Download a fully functioning Bokeh demo from http://www.alienskin.com/ and tell yourself that it's only for 30 days and there's no way you will ever buy it.

Yeah. Sure.

Thursday, November 27, 2008

Passionate Images...

It is nearly the end of another working day. For a special events company, this is "high season," when better than 40% of our year's income will be made. There are many things that should be foremost in my attention.

But I am thinking of our "enchanted forest" instead. You see a faint glimmer of what we (my grandchildren, my wife and me) have seen in the image above. It's a place of twisted trees and mysterious valleys. It's a place where light plays odd tricks on your eye and you are better than 50% positive that a fairy disappeared from view on the very edges of your vision.

When we first brought our grandchildren here, we (my wife and I) were playing a "mixed up story." What's that, you ask? It's a story where the children are on an adventure. It's sort of Dungeons and Dragons for the 'wee folk.' I created this series with the cold-blooded intention of instilling in them the same ache that exists in me: the longing to see the fantastic emerging from the mundane. The "real world" has so very often inspired a sigh in my soul with a longing for something more. I prefer to see something fantastic emerge from the mundane.

That's where the "mixed up stories" come from. The kids take actions...and the actions they take effect the plot.

Does that sound silly to you? Think for a moment about creating a world where invincible skeletons paddle through an acid sea, looking for invaders. It is so very important to me that these kids have the ability to dream! Reality has been a completely unacceptable alternative to me since I was a kid.

We returned to our "Enchanted Forest" at the insistance of our grandchildren. They remembered being here from years ago. We arrived there as the sun was going down. That's when I took the picture that starts this blog.

I became an ogre, searching for "tender young humans" to eat. My grandchildren giggled and ran up a tree. I searched for them stomping through the Enchanted Forest. Finally, seeing them, I launched into my "fee fo fum" rhyme.

They were so very happy in that instant, that it made a lump form in my throat. Our enchanted forest had been so seriously reduced over the years. ("They" are building a subdivision, you see.) Even as I growled after them...I ached for the notion of a place where old trees were NOT torn down to make way for duplexes, where an Enchanted Forest was allowed to stand forever for the kids to play in...and flee from flesh eating ogres.

Part of me grieved for that forest. Once it was populated by twisted trees and valleys. Now it is so very stark and broken and still defiantly glowing.

I think it will glow until the last tree is ripped out by a bulldozer.

At least I hope so.

I truly do. With all my heart.

Wednesday, November 26, 2008

The Eyes Have it

I loved this image the instant I took it. In the first place, this face is very dear to me. In the second place, it's an arresting image. You just want to look at it. Okay…I want to look at it.
There are two versions of this shot. Have a look at them.
It's NOT the same image, is it?
Take a few seconds and look from one to the other and try to decide which one seems more alive to you. Which one do you prefer?
I suspect nine out of ten dentists would prefer the one with the twinkle in it.
Keep in mind that, except for the eyes, this is the same image. One has had a minor eye operation -- and the other hasn't.
That twinkle in the eye is called a "catch light." Really, it's just a reflection of light bouncing off the eyeball. But look at what a HUGE difference it makes to the overall image! Those two little white dots bring the whole picture to life.

Making the transition is easy in Photoshop. The trick is NOT to try to put something there that didn't exist in the first place. If you've ever tried to put a catchlight into an eye you know what I mean. It just winds up looking goofy and way too artificial.
The idea is to take the catchlight that was already there and make it stronger. Here's how to do it in five easy steps:
1) Zoom in on the eye. Photoshop will go to 1600%. This means that you will have a HUGE eye on your screen.
2) Reduce your BRUSH tool to ONE pixel. If this seems extreme to you...please consider you are doing some EYE SURGERY here.
3) Sample the color from the brightest part of the existing catchlight. This is the most effective way to build a bigger catchlight, since you are enhancing what's there naturally. The position is important. Wherever the catchlight was before...is where you are putting the "new and improved" catchlight.
4) Carefully paint ONE PIXEL AT A TIME outward from the center of the catchlight. Remember that you really only need to increase the size of the catchlight a little to effect the transformation.
5) Go to View> Fit on Screen and take a hard look at your image. Does it look better? If so, save under another name (since writing over your original is punishable by severe flogging in Photoshop-aware states and never ever a good idea) and you're done.

While you're working in the eye, you may also want to remove anything there that isn't the catchlight or the pupil. Often subjects will have bloodshot eyes closest to the nose. Use a very light touch with the Clone or Healing tool to wipe them away.

The whole process took me under five minutes on this image. "Eye" think it was time well spent. (sorry...)