Monday, March 31, 2008

They're Coming for You, Barbara

There's something about cemetaries, isn't there? For photographers they offer some obvious advantages: the subjects aren't going anywhere, there's lots of drama. Let's face it: it's interesting to see what relatives have done and had to say about their dear departed.

In the middle of Brownsville is one of those cemetaries. It's in one of the seedier parts of the city but we were lured there by the promise of really old graves.

There are old graves here. Some of them date back to the civil war.

I took the image above this afternoon and I was struck by the oddness of the little angel. It stands there year after year over top of a grave that really looks forgotten. Here's a thought about composition: when photographing statues you either have to go with little parts of the whole "picture" or, if it serves the graphic better, you can put the image into context. ('Context' is the fifty dollar way of saying "where the thing was.")

I knew the picture was here somewhere. I took a number of pictures of this little angel, (ALWAYS take a ton of pictures of something you KNOW you are going to use. It's digital. Relax. What doesn't work can be deleted) close ups as well as long views. Nothing was working when I got it back onto my Photoshop screen until I put the little angel into her own context. The image is much stronger for the background context.
The statue to the above is a good example of how to use a close-up of a statue instead of the whole thing. There are three main components to the graphic: the woman, the cross and her hand gently drawing the cross close to her.
The actual statue is fairly heavily time worn so I needed to take some time to restore parts of her face and smooth out her hand a little.
The final touch was turning the picture into a black and white graphic and actually adding grain. Why make that decision? A couple of reasons: the grain masks some of the rougher areas of the statue. It also ages the graphic quite nicely. There are a couple of ways to easily add grain without going overboard.
The first is to make a copy of your graphic, add as much grain as you like (I use Exposure by Alien Skin, but you can easily add grain with some of the brushes already included with Photoshop) and then FADE the OPACITY so that the grain is more gently added.
The second method is to add grain and then play around with the Blending Modes. Try increasing the Contrast and then doing an Overlay Blend.
When taking pictures on a grey day -- like today in Brownsville -- you will find that your Dodge and Burn tools are your best friends. Give them about 50% power and move gently over your graphic to increase shadow and lighten areas where the graphic is too dark.
When photographing in cemetaries, just keep one eye peeled for shambling zombie types clawing their way out of the ground. Just in case...

Sunday, March 30, 2008

Howdy from Brownsville!

"No hyperbole is too big for Texas," observed my wife. I had to laugh. The signs are big. The stores are big. Everything is BIG here. And it's hot! We left Edmonton yesterday morning in weather where we could see our breath and arrived here to temperatures of 26C (that's over 80 degrees for you Americans...)

After exploring Texas for a considerable period of time, we finally found our temporary home. We were up and out this morning. I have to tell you, folks, I LOVE travelling. There's something about being in a place I've never been before in a culture I've never encountered that makes the whole world sparkle.

We met another Canadian couple this morning. They've been here for three weeks. Expecting a raft of information, we asked them what they'd done. They replied that they have spent a lot of time around the pool. And they go grocery shopping. Three WEEKS? That isn't travelling, folks. That's existing in a warmer place.

We were on our way to a place we thought would be a wonderful experience. Last night I saw an ad for a Texas Gun Sale and Show in nearby Pharr. What can be more of a cultural trip than a GUN SHOW IN TEXAS?

Along the way we saw the Big Red Barn. It's called the Big Red Barn because it is a Big Red Barn. Here they advertise in a BIG sign that they sell cards. But the sign on the door said they were out of cards, even though they were open.

A card shop that is out of cards was something that demanded a picture. But the image had some very specific problems: the doorway with the "we're out of cards" sign was in the shadow and the BIG sign advertising LOTS of cards for sale was weatherworn, faded and in bright light.


It's always a good idea to pre-plan what you are going to do with a photo before you take it. I decided to focus on the small hand-done sign on the door and manually darken the big sign later. This is exactly what I did. I left the darkening on the big sign fairly rough since that makes it look like weather.

We were finally on the road to the gun show when we saw something that made us cross two lanes of traffic and pull into the driveway of a closed business. It was a police car from another era. It looked like it had been "shot up pretty good" and it demanded a picture.

I knew from the instant I took the picture what I wanted to do with it. It was going to be turned into a grainy 1950's style photo. I used Alien Skin's Exposure and a desaturation brush. I copied the original picture and put it under the black and white one. I reduced the opactiy of the top layer JUST enough to give it some textured color and then manually added some more grain.

We got back on the road to the Saxet (which is "Texas" spelled backward, clever, huh?) Gun Show.

I'll be honest here: I really expected to see a bunch of rusty pick up trucks, inbred Hillbillies and back wood survivalist/conspiracy theory types. But there were all kinds of people there. Guys in business suits, Mom, Dad and the kids and only a few creepy guys with dark suspicious eyes. I was already thinking about the great pics I was going to get.

We got to the front desk and the guy eyed by backpack. "You got a camera in there? Or a loaded firearm?"

"Yup. Got me an eVolt 500 with a smoking telephoto," I said, wishing I chewed tobacco so I could spit confidently into a spitoon.

They took my bag away, apparenly having no sense of humour about they whole thing. The organizer explained that they take a beating in the press.
If this were a travel blog, I'd be telling you about what I saw in there and the people I met. They were classics and made for a delightful travel experience. This is the exact reason we travel, my wife and I. Pictures or no pictures it was an utterly delightful afternoon.


I had to settle for pictures taken outside. Since there was nothing interesting about the building, I chose to take some pictures of the large sign advertising the gun show. I saw a Stop sign that could be framed by light poles and some of the other signs.
I had to sigh as I looked at this shot. It's not particularly interesting. But I plan to work on it later and see if I can make something of it.
If I come up with anything...or any of you out there in the non-Brownsville world have any ideas...why not let me know what they are? There's something in this image. But right now it's kinda late and I need to go to bed.
Adios, amigos.

Thursday, March 20, 2008

Hello, Brownsville!

“So do you want to go to Brownsville?” my wife asks.

“Sure,” I reply. “What’s in Brownsville?”

“I have no idea.It's in Texas. It’s close to the border with Mexico,” she tells me. “The travel agent says it’s a great destination.”

She’s on the phone, so I don’t actually see her shrug. But I know she’s shrugging.

We've taken a lot of trips, my wife and I. We always have a great time. There's always something to see. Something to do...and ALWAYS something to photograph.

“Okay,” I say. “Let’s go to Brownsville.”

That conversation took place months ago. Now I am in my “Happy Place.” This is one of my favorite parts of a trip. I call it “The-Week-Before-We-Leave” part. My spirit is constantly aware of having something to look forward to and my mind is in a convivial state of speculation about who we’ll meet, the places we’ll go and of course the pictures we’ll take. (I don’t suppose you have any idea how long I have tried to work the word ‘convivial’ into a blog…)

It’s all about the pictures.

I go back to a snapshot taken of two gondoliers in Venice laughing as they share a joke – and I can smell the risotto.

We were in New York City last year for St. Patrick’s Day and spent the whole day photographing the parade. When I look at my picture of a cold cop waiting for the parade to start, I’m there again.


When I see my shot of a whale tail dripping water, I am on a whale watch boat in Maui surrounded by people going “ooooooo” and “ahhhhh” and “Tommy get the HELL away from the rail. You’re going to fall in.”

We’ve talked in this blog about how important it is that the pictures you take make for a visual experience; that in some way you can use the picture to share what it was like to be there.

Here are some tips for making those experiences crystal clear recollections once you get home and begin the happy task of working on your pictures.

1) My wife has the annoying habit of stopping in the midst of travel, plunking herself down on a convenient curb or bench and writing. She makes notes about where she was and what she saw so she can refer to them later. I invariably find myself asking her where we were when certain things happened. She will sigh, open her notebook, and after a brief lecture about how I really should be keeping my own notes, she’ll tell me.

2) Don’t waste your time transcribing what the plaque says or taking down information from one of those tourist signs. You have a digital camera. Take a picture of the plaque or sign. It’s faster and more accurate and it doesn’t slow you down.

3) Take LOTS of pictures. Don’t always try to compose the perfect shot. You’re going to miss some of the cool stuff that way. Take the best picture you can. But take LOTS of pictures. You can crop to a precise Rule of Thirds once you’re home. You can touch up things with Photoshop. And if your picture stinks, you can delete it.

4) Remember that if you are planning to sell your shots, you need to be very careful not to include any of the rapidly expanding subjects that are considered copyright infringements: trade names, people’s faces, corporate logos on buildings or t-shirts and many more. If you are one of those brave souls who snaps pictures of people you don’t know, ensure you take model releases.

5) When you’ve taken your artistic shot, take a broad angle documentary shot. What do I mean? Let’s say that you have photographed the hand of a statue holding a gun. You need to take a picture of the WHOLE statue so you can refer to it when you’re back home wading through the thousands of pictures you’ve taken. This comes in handy. Honest.

So I’m going to check my camera bag and try to figure out what gear is going with me and what’s staying home.

I'll be posting from Brownsville. You guys want to come along?

Sunday, March 16, 2008

Photography Bag Stuff YOU NEED!

It’s a VERY unpleasant feeling. Let me set the scene: you’ve travelled a long way and are now going about the business of taking pictures. Just as you begin, you find that you are missing something REAL important.

You can curse, brood and/or pout. But nothing is going to make it all better.

The harsh reality of travel photography is that the shot you want is often there for just a second or two and then it’s gone. Unless you are ready, you’ll miss it. (Am I the only one that actually grieves about having missed That Great Shot?)

There are some things you REALLY need to pack up along with the camera to make your travel photography a success. Here are the TOP THIRTEEN things that go into my travel bag when I hit the road:

1) Your Back-up Camera. This, for me, is a little point and shoot that I can use if all else fails. Having your back-up means that if you’re going somewhere you don’t THINK you’ll need your ‘main’ camera, you will have this puppy in a pocket – so that if you see something you STILL can get a picture. You will pretty much ALWAYS see something you want to take a picture of.

2) Extra Batteries. This is basic, right? But if you are a thousand miles away from the battery you left on the charger the night before you left, you will be one unhappy camper. Check the bag.

3) Battery Charger. I forgot this one time. Actually, I am better than 50% convinced that gremlins crept into my house in the middle of the night and took it out of my camera bag. I was SURE I packed it. Check the bag.

4) Lens Pen: this is one of those indispensable things. It has a soft graphite tip on one end and soft bristles on the other. It’s about the same size as a pen and will run you about fifteen bucks. This is a critical part of your kit. Nearly everything can be cleaned off your lens in seconds with one of these.

5) Lens Wipes. You can get these at an optical store. Don’t take the bottles. Take the pre-packaged lens wipes – each in its own foil packet. These are always necessary. When you’re doing anything by the ocean, like a whale watch, they are REALLY necessary to cut through the salt that migrates onto your lens.

6) Extra Memory Cards. How many? More than you will need. Can you imagine the feeling you’d get if you saw a frog tap dancing down 5th Avenue in New York City and were out of memory cards? It’ll cost you a couple of bucks to be covered.

7) A Case for your Memory Cards. We all need a system: I have a little plastic case that cost me about three dollars. I wouldn’t sell it for a hundred. I get all my memory cards in there. I can tell at a glance which cards are used and which ones are available. Here’s a thought about memory cards: don’t get the Mega Monster Cards. Why? My wife once pointed out that if you lose that 8 gig memory card – you’ve lost EVERYTHING. Or if the memory card fails, you’re done.

8) GorillaPod. I used to pack up tripods and monopods and never use them. They are a pain in the you-know-what to carry. The GorillaPod is an ingenious little tripod you can wrap around trees, fences. You can set them on the ground. Small. Lightweight. Very easy to use especially for a point and shoot or moderate sized camera.

9) A Poncho. Don’t be proud. Go to a Dollar Store. They cost about a dollar and come in little pre-sealed packets. I know it would never rain on YOUR vacation – but it’s rained plenty on mine. A poncho you can whip out of the bag and use is a Gift From God. It means that you can still travel and photograph and keep your camera and camera bag safe. When you’re done…toss it away (provided you’ve bought several at the Dollar store.)


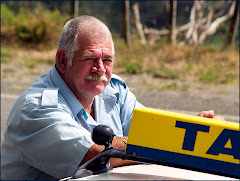
10) A Great Hat. Okay…I know it’s not strictly Photography Stuff. But a Great Hat can make all the difference on a day when it’s raining…or snowing…or really hot…or cold. That's me wearing my Great Hat. (Photo by Sheree Zielke) I don’t go on vacation without my Tilley hat. It blesses me over and over again.

It has a secret compartment in the top for stashing extra cash, doesn’t give me hat hair and has a chin strap for windy weather. Making you more adaptable to the weather means you can take more pictures.

11) An Expo Disc. If you aren’t using an Expo Disc – you are working WAY too hard. Learn how to use an Expo Disc and you will never have to guess at the right white balance for the picture ever again. Given that you can set the custom White Balance on your camera – taking perfectly exposed pictures is a breeze. It’ll cost you about a hundred bucks. It’s one of the best investments I’ve ever made.

12) A Field Storage Drive. I use a Wolverine. It cost me about $200. It’s slightly larger than a cigarette package. As I use memory cards, I can load them onto the Wolverine in the field. This does two things: I get a back-up of my photos right away AND I can reuse the memory cards if I HAVE to.

13) A Card Reader. Nuff said.

I’ve skipped the obvious Big Three. At first I thought they were far too obvious to mention. But maybe not. Here they are:

A GOOD CAMERA BAG. This puppy should be water resistant and comfortable to wear for hours. Don’t skimp on the camera bag. You will be wearing it for hours and miles each day. Choose one that fits you and your stuff. Make SURE it fits. Make SURE it doesn’t rub you the wrong way. Wear it at home before you leave. That way you will spare yourself the misery that comes from a bad bag on your trip.

TRAVEL WITH TWO LENSES. That’s it. I take a wide angle and a telephoto with my Olympus eVolt 500. That’s all I will carry. While it is true that I may miss one in a thousand shots because I don’t have a specialized lens, it is also true that I don’t cart around a lot of extra weight that I probably won’t use.

YOUR LAPTOP. If you’re like me (and who isn’t?) one of the highlights of your day is taking the pictures off the cards and/or storage drive and seeing them. Usually I can’t resist tinkering with them with Photoshop. It would be consistent with the tone of this piece to suggest that you take a mini laptop. But I always travel with my 17 inch screen laptop. As far as Photoshop is concerned...go big or go home. (You heard it here first.)

The key is taking time to think about where you’re going, the shooting conditions you’re likely going to run up against and any difficulties you are likely to face.

Do YOU have any accessories you think need to be on this list? Feel free to post them here. And if you’d like more information about travel photography, check out our website: http://www.photoshopbasics.com/

Remember that a happy photographer is a productive photographer.

Productive photographers are happy photographers.

You get the idea.

P.S. My wife just reminded me that in moist environments (like the Amazon jungle) you need to remember how much digital cameras hate moisture. So pack a Ziploc Bag and a half dozen of the little silicone packets they stick into new purses and briefcases. That way if it gets damp put the camera into the bag, close it up and let the silicone do its work.
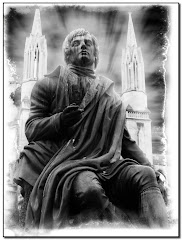
Tuesday, March 11, 2008

Contrasting Contrasts

A poet once said “we are never so close to God as when we forgive.”

I think he SHOULD have said “We are never so close to God as when we really learn how to use our Contrast Settings in Photoshop.”

Contrast is a delight. It can transform a guy glumly contemplating a flat picture into a happy dancing graphic artist. Contrast is the perfect way to brighten colors and create scenes that pop off the page and leave lasting impressions in the eyes of the viewer.

And Contrast has never EVER been as wonderful to use as it is in Photoshop CS3. The interface is held to one little slider. You’ll find this little gem under Image> Adjustments> Brightness/Contrast. It will bring up a slider that looks like this:


You can see real-life previews of the changes the contrast settings are making to your picture as you pull the slider to the right or the left. I recently had cause to use this contrast for a graphic I was working on starring a tugboat in the Tasman Sea.

This little guy looked impossibly small. The way the colors of the boat contrasted with the colors of the ocean made a beautiful picture. But my initial pic was flat and uninteresting. How exactly a red tugboat on a blue ocean can be visually uninteresting is beyond me. But I managed.

Opening the Contrast slider menu, I started working with it and the differences were significant. Compare the two pictures. Hopefully they are big enough for you to see. Check out the color of the water, the redness of the tug:


The differences are striking.

They are both the same picture. But stronger contrast results in what is clearly a much stronger image. All the information was already in the original photo. Contrast simply made it pop.

Don’t ignore the effectiveness of layering when you are attempting to rescue a flat picture from Low Contrast Hell. Remarkable results can be accomplished when you COPY your picture onto a new layer and wildly bring the contrast levels up. Now work with the OPACITY of this hugely contrasted layer and you can get results that will either be jaw-dropping or really hideous. (This is why “Delete Layer” and “Undo” exist.)

If you’re relatively new to Photoshop, it’s a splendid idea to play around with all the settings in the Adjustment Menu. The vast majority of things that need attention in improving picture quality can be found here.


You may find at times that you want to lighten the contrast of your photo. More commonly, you may choose to lighten elements of the BACKGROUND contrast. If you're working on a graphic where your model is in the foreground -- but the background is so colorful it's distracting, you will want to select that background and tame the contrast a little.


Our eyes are drawn to vibrant color -- or the lack of it. This means that by manipulating contrast the artist can easily manipulate where the viewer's eye goes.


This is an example of REVERSE contrast use. Have a look at this "Lady of the Wall." She is a relatively minor feature on a wall of a building in Rome.
How to make this picture REALLY work bugged me for days. I wanted the eye to go to her, but the background was just so awfully vibrant.
I increased the contrast on the background to her left and gradually decreased the contrast in a gradient across the image from left to right.
The use of contrast this way actually created a visual line across the image. Most people will see her face, then their eyes will travel to that image with the pointy ears to her left and back across her face again. This entire line was created with contrast.
To complete the effect, I added an acid washed border that lightened all the components around the edges of the picture so that the center became very much the main point of interest in the graphic.
Use the contrast options Photoshop offers. Use layers to create that perfect blending of light, color and brightness. Your images will be much more powerful.
Honest.

Monday, March 10, 2008

Create a Visual Experience

Sync Magazine named Gary Gygax the #1 Nerd of All Time. He's the guy in the Hawaiian shirt to the left. (Pic courtesy of Wikipedia.)

I spent one night a week with Gary for nearly six years. But I never met him in person.

He had a profound impact on my life – even though I only spoke to him once.

So who is Gary Gygax…and what does he have to do with a blog that covers Photoshop and photography? Hang in there for a second.

Gary Gygax was the creator of a game called Dungeons and Dragons. His plan was to design a new kind of game – a game where people could experience an adventure together.

He wanted to know what it would feel like to creep into a dragon’s den or experience the heady excitement of being part of a fellowship, embarking on an epic quest.

So what does Gary Gygax have to do with Photoshop and photography? Plenty.

Think back to a picture you saw in a magazine or in a book that really held your interest. I’m not talking about a pretty sunset or an ocean landscape. I am talking about a picture that you looked at for a while because it struck a powerful chord in you.

This isn’t the kind of picture you just look at. It’s the kind of image you examine. The visuals on the page reach out to you, take you gently by your spirit and help you to experience what the photographer or Photoshop artist was feeling at that moment.

For me one of those pictures was a portrait I saw once of rock and roll legend, Janis Joplin. It’s the work of another photographer, so I can’t post it here. But the image had Janis smiling shyly at the camera. She was wearing a big floppy hat and a flower necklace and nothing else. But there was an expression on her face that was quite unlike the brash rocker I knew. The photographer chose to present his image in B&W and that made for an even more dynamic visual.

Okay, okay, you’re saying. But what does that have to do with Gary Gygax? And what does Gary Gygax have to do with Photoshop and Janis Joplin’s portrait?

Gygax wanted to create an experience. When others were designing games with winners and losers, he wanted to re-think everything and re-design it to give his audience the gift of an experience.

Joplin’s photographer wanted to do the same thing with his portrait. He wanted us to know a little more about the singer – but more than that, he wanted to share HIS experience of being with her. He didn’t see the Southern Comfort swilling blues/rocker. He saw a shy girl with flowers and a silly hat.

What stands out in your mind about the image you’ve seen? What makes it strike a chord in you?

Now to the purpose of this WHOLE entry: What pictures have YOU taken that have that kind of power, and will let you communicate your feelings to an audience of people who have never met you…or been to the places you’ve been….or talked with the people you have photographed?

You need to look at a photo and decide what aspects of it will speak to these strangers. Take a look at this list of the Big Three:

1) Does the subject define an archetype? Consider a close-up of a Wise Old Man, A Hard Working Farmer or An Adventurous Woman. Your subject needs to speak to people you don’t know in a language they will understand. If the face alone doesn’t do it – consider putting your subject into an interesting environment doing something that defines them. They are called archetypes because they have elements to them that all people can relate to on some level. The entire purpose of shared photography is to provide a visual people can relate to. Archetypes are great – because they take you half way there.

2) Does the image project two things that don’t fit together? Think about a street person in expensive clothing. How about an entire city fit inside a bottle...and floating through space? Consider a photo of a street performer which has been rendered into a drawing with a turn of the century flavor to it. The mind goes right away to visual juxtapositions because it tries to make sense of things that don’t fit. When this happens you have the complete attention of your audience.

3) Can you verbally summarize the point a picture makes in one sentence? We’ve all seen pictures of wide eyed children suffering terribly in Africa. You can see the pleading in their eyes. The message is clear “Help me, please.” It’s powerful…but it’s also an image that has been overused. How about taking that same image – and Photoshopping the image of the child into an image of a sumptuous Las Vegas buffet or casino? What would that picture say then?

Think about the presentation of your graphic: should it be in hyper-colors or Black and White? Would grain make the image stronger or does the focus need to be razor sharp?

Gygax taught me that it was okay to disregard the rules of a game and do away with the whole winner loser thing because the whole exercise is about creating a powerful EXPERIENCE.
When you are attempting to create a great graphic – do the same. Forget the rules. Use every tool at your disposal to create a visual that grabs your viewer by the spirit and makes them a part of the experience.

And give a thought once in a while to the Number One Nerd of all time.

Monday, March 3, 2008

Resolving Resolution...

When I was learning Photoshop, totally understanding the whole resolution thing made my head hurt. I simply could NOT get a straight answer. I got lots of people telling me things and even as they were talking I could feel my eyes glass over.

I really wanted someone to explain what resolution was in plain and simple terms. And I wanted to know what kind of resolution I should have for the various projects I was working on.

Here is the Patented David Thiel Explaination of Resolution And How It Effects YOUR PICTURE.

Ready?

Resolution is how much information is in your picture. MORE information means your picture file is BIG and if you are planning to make a big print out of that sucker, you WANT a BIG file. Why? Because more information means more pixels (the tiny dots that make up a picture) and you WANT lots of pixels to give you a nice crisp print.

LESS information makes your picture file SMALLER. You want smaller files for pictures that you plan to display on the web or use in PowerPoints. The smaller files make it easier for the computer to handle and eat up much less space on your drive. EVERY picture on this blog is a small file which is why they load very quickly. ..but would make terrible prints.

Photoshop and Photoshop Elements make it very easy to change the resolution of your photo.


Go to Image> Image Size and you get this option screen. In the red box is the Pixel Dimension information. Here you see it's nearly 14 Megabytes. This size of file would give PowerPoint a serious headache.


This is the photo in it's "just downloaded" state.

The other two Very Important Boxes are also highlighted. RESOLUTION (inside the green circle) is where you can cut the overall file size.

The value of Resolution will directly impact that 13.7M file size. If you click inside Resolution and change it from 314 to 72, you'll note an immediate change in the file size.

Constrain Proportions is ALSO checked. This is defined in the blue box. If you plan to work with the width or height of the photo size and you don't want Aunt Martha to turn out looking like an alien invader from the planet Ziggat, you want to ensure this box is checked.

So RESOLUTION affects the amount of information in a graphic.

How do you decide what is the RIGHT Resolution?

You decide in advance WHERE you plan to display your work. Lots of artists, myself included, design work for display online...and in PowerPoints. I rarely print. I will nearly always cut the resolution to 72. (If you're printing, you want the leave the file size as large as possible. There are tables for how big these files should be if you're printing a smaller size photo as opposed to a larger one...but save yourself the headache. Just leave the file size BIG.)

The upside of cutting the resolution means I can work very quickly inside Photoshop (the application of filters, for example, is much faster since the software has a much smaller amount of informaiton to work with) and I know the final product will be easily uploaded to blogs, websites and PowerPoints.

The downside: I can't expect prints of any decent quality and if I am EVER planning to print my photo, I will have to do it all over again.

Here's the very best way to have your cake and eat it too: IF you are willing to live with slower Photoshop response time, do all your edits and all your work with the large sized file. THEN reduce the resolution to 72 and "Save As" a reduced file. This way you have ALL your options open.

As always, make sure that you save an UNFLATTENED graphic in the Photoshop format so you can go back and make changes if you like. You'll eat up vast amounts of disc space doing it this way -- but you'll be glad you did when you desperately need to print the photo.

Besides, external drives are MUCH cheaper now and you can always save the photo there.