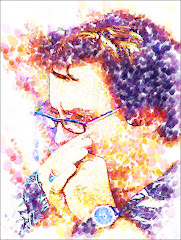
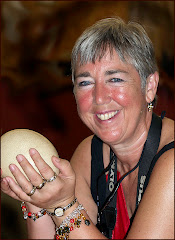
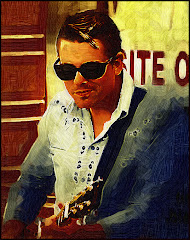
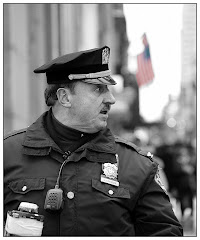
I loved this image the instant I took it. In the first place, this face is very dear to me. In the second place, it's an arresting image. You just want to look at it. Okay…I want to look at it.
There are two versions of this shot. Have a look at them.
It's NOT the same image, is it?
Take a few seconds and look from one to the other and try to decide which one seems more alive to you. Which one do you prefer?
I suspect nine out of ten dentists would prefer the one with the twinkle in it.
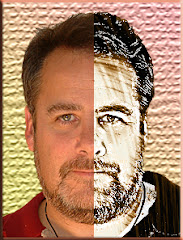
Keep in mind that, except for the eyes, this is the same image. One has had a minor eye operation -- and the other hasn't.
That twinkle in the eye is called a "catch light." Really, it's just a reflection of light bouncing off the eyeball. But look at what a HUGE difference it makes to the overall image! Those two little white dots bring the whole picture to life.
 Making the transition is easy in Photoshop. The trick is NOT to try to put something there that didn't exist in the first place. If you've ever tried to put a catchlight into an eye you know what I mean. It just winds up looking goofy and way too artificial.
 The idea is to take the catchlight that was already there and make it stronger. Here's how to do it in five easy steps:
1) Zoom in on the eye. Photoshop will go to 1600%. This means that you will have a HUGE eye on your screen.
2) Reduce your BRUSH tool to ONE pixel. If this seems extreme to you...please consider you are doing some EYE SURGERY here.
3) Sample the color from the brightest part of the existing catchlight. This is the most effective way to build a bigger catchlight, since you are enhancing what's there naturally. The position is important. Wherever the catchlight was before...is where you are putting the "new and improved" catchlight.
4) Carefully paint ONE PIXEL AT A TIME outward from the center of the catchlight. Remember that you really only need to increase the size of the catchlight a little to effect the transformation.
5) Go to View> Fit on Screen and take a hard look at your image. Does it look better? If so, save under another name (since writing over your original is punishable by severe flogging in Photoshop-aware states and never ever a good idea) and you're done.
While you're working in the eye, you may also want to remove anything there that isn't the catchlight or the pupil. Often subjects will have bloodshot eyes closest to the nose. Use a very light touch with the Clone or Healing tool to wipe them away.
The whole process took me under five minutes on this image. "Eye" think it was time well spent. (sorry...)